

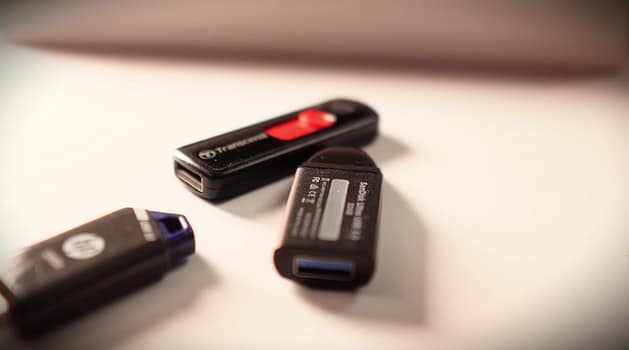
A single USB drive can hold Windows installers, Linux distributions, recovery environments and other bootable images without having to format the drive every time you want to add a new ISO.
That is what makes Ventoy useful. Instead of “burning” an ISO directly to a USB drive, you install Ventoy once and then copy ISO, WIM, IMG or other supported image files to the drive. When the computer boots from it, Ventoy presents a menu containing the available images. (Ventoy)
The current Ventoy release listed on its official website is Ventoy 1.1.17, released on July 24, 2026. The official Windows package is available from Ventoy’s download page, with SourceForge listed as the download mirror. (Ventoy)
What You Need Before Starting
Prepare the following:
- A USB flash drive or portable SSD
- A Windows computer
- An internet connection
- The Ventoy package for Windows
- One or more ISO files, such as Windows 11, Ubuntu or another supported operating system
Important: Installing Ventoy on a USB drive will erase the existing data on that drive. Back up anything important before proceeding.
A portable SSD can also be used instead of a conventional flash drive. Ventoy officially supports installation on USB drives and can boot multiple image types from the same device. (Ventoy)
Step 1: Download Ventoy From the Official Website
Open your browser and visit:
Download the latest Windows ZIP package listed on the official Ventoy download page. At the time of publication, the package is ventoy-1.1.17-windows.zip. (Ventoy)
Ventoy provides SourceForge as one of its official download locations, so make sure you are downloading the package from the official project page or its linked mirror.
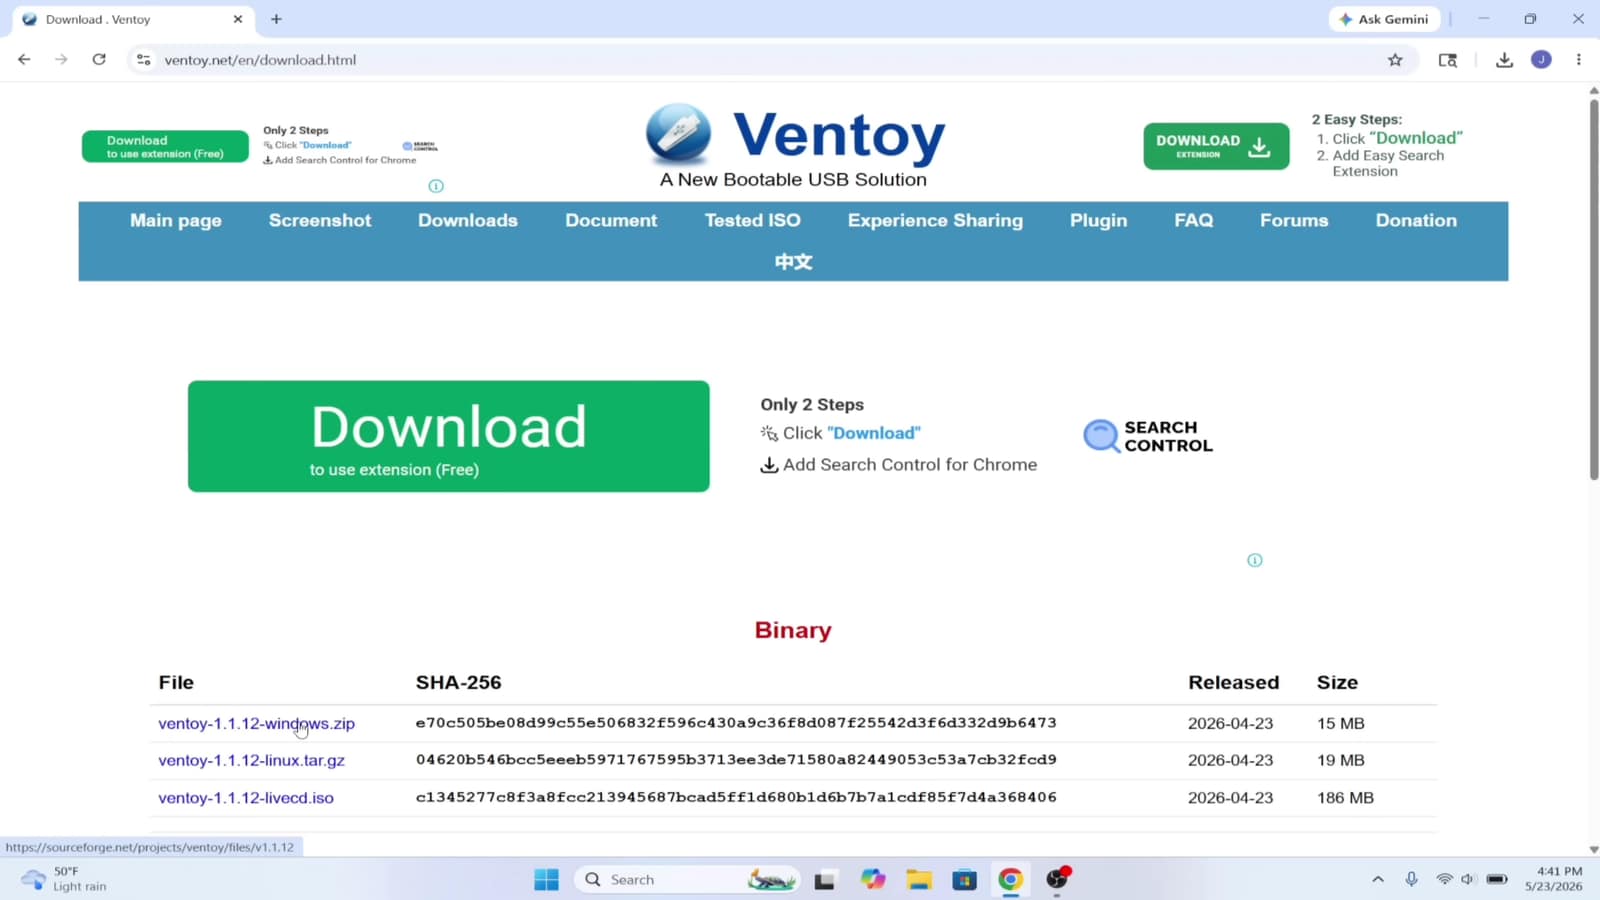
Do not use random third-party download sites for the installer.
Step 2: Extract the Ventoy ZIP File

After downloading the ZIP file, right-click it in File Explorer and select Extract All.
Open the extracted folder.
The Windows package contains the Ventoy installation utility, including Ventoy2Disk.exe, which is the graphical tool used to install Ventoy on the USB drive. (Ventoy)
You can keep the extracted folder on your Desktop or another convenient location.
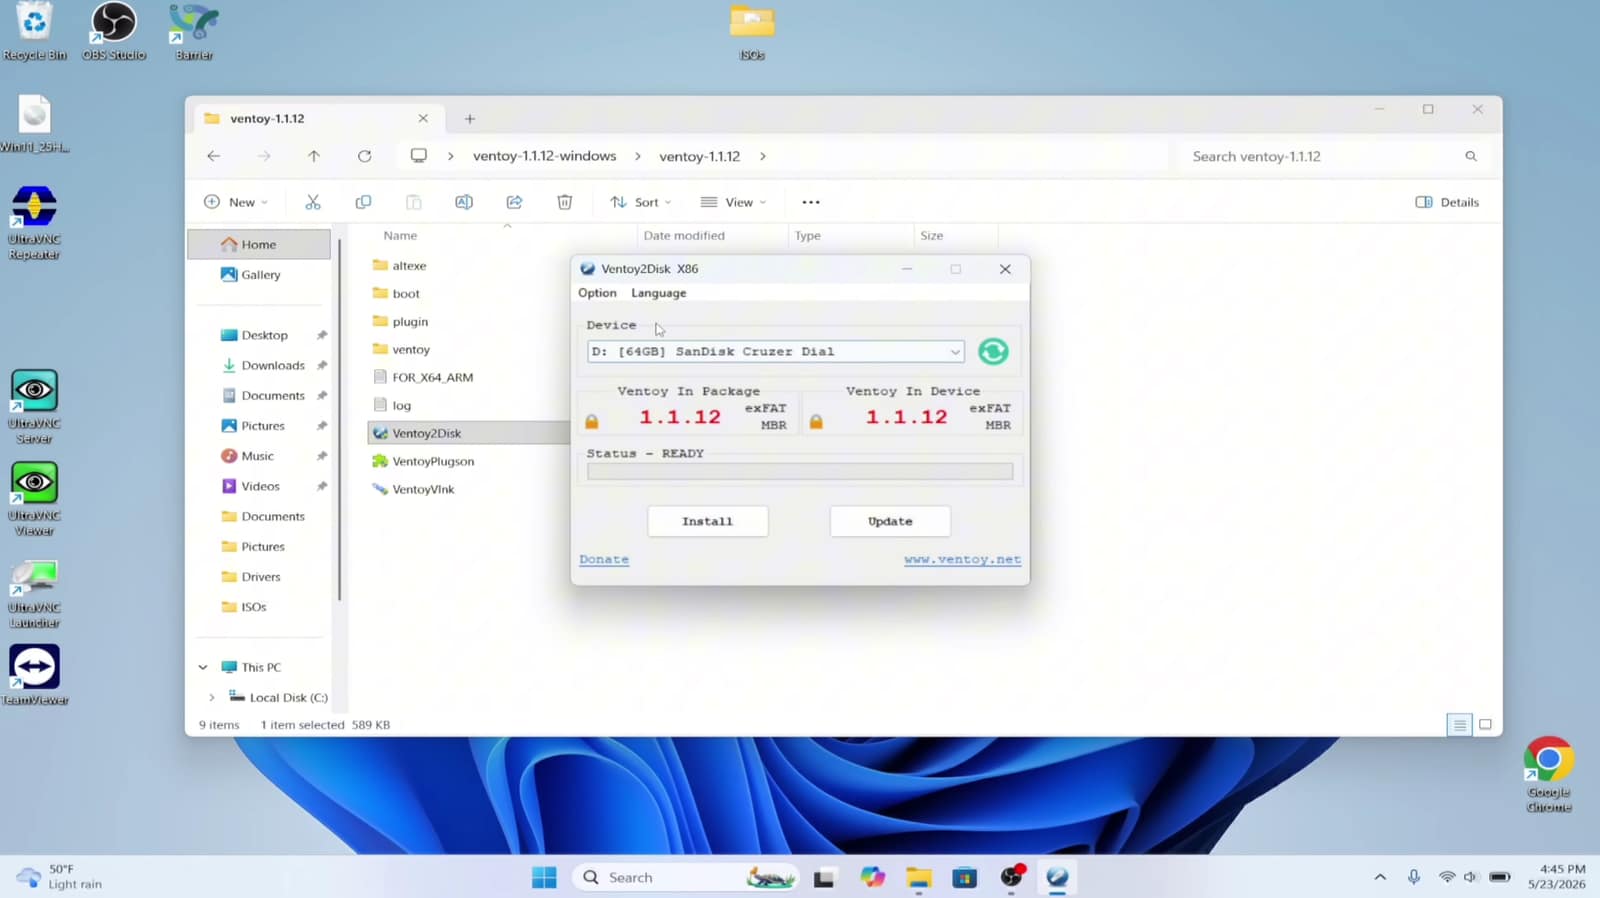
Step 3: Connect the USB Drive and Open Ventoy2Disk

Connect your USB flash drive or portable SSD to the computer.
Inside the extracted Ventoy folder, double-click:
Ventoy2Disk.exeIf Windows asks for administrator permission, approve the prompt.
The Ventoy application will display available USB devices. Select the drive you intend to use.

Check the drive carefully before installing.
Selecting the wrong disk can result in permanent data loss.
Ventoy normally lists USB drives in the device selection interface specifically to reduce the risk of accidentally selecting an internal disk. The application also has a setting to show additional devices when necessary. (Ventoy)
Step 4: Install Ventoy on the USB Drive
With the correct drive selected, click Install.
Ventoy will warn you that the device will be formatted and its existing data will be lost. Confirm the operation.
Depending on the version and interface, you may receive additional confirmation prompts.
Wait until Ventoy reports that the installation has completed successfully.
At this point, the USB drive has been prepared as a Ventoy boot device.
Step 5: Copy ISO Files to the Ventoy Drive

This is where Ventoy becomes much more convenient than traditional USB-burning tools.
Open the newly prepared Ventoy drive in File Explorer.
Now simply copy your ISO files onto it.
For example:
Windows11.iso
Ubuntu.iso
LinuxMint.iso
RescueTool.iso
You do not normally need to extract the ISO files first. Ventoy is designed to boot supported image files directly from the storage device. (Ventoy)
You can also organize the files into folders. Ventoy supports browsing image files in different folders and provides a boot menu for selecting them. (Ventoy)
Step 6: Boot the Computer From the USB Drive
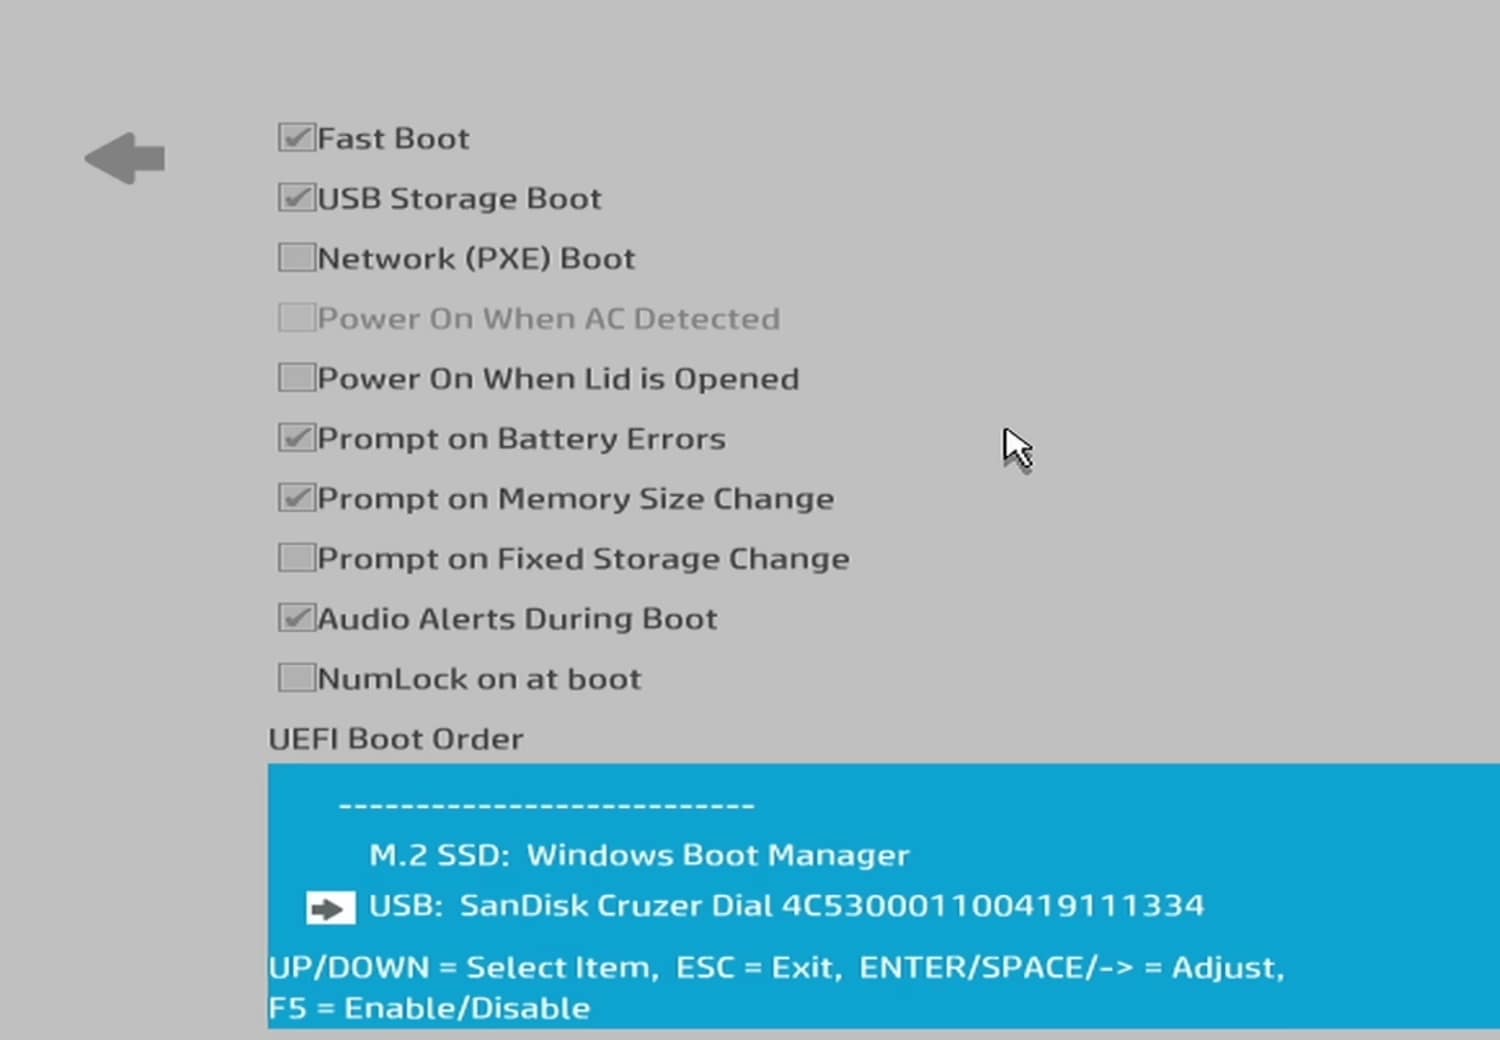
Leave the Ventoy USB connected and restart the computer.
Open the computer’s UEFI/BIOS boot menu. The exact key depends on the manufacturer and model; common keys include F2, F12, Delete and Esc.
Instead of permanently changing the boot order, many computers allow you to select the USB drive from a one-time boot menu.
Choose the Ventoy USB device.
The computer should then load the Ventoy interface.
Step 7: Choose an Operating System From the Ventoy Menu

Once Ventoy starts, you should see a list of the ISO files stored on the drive.
Use the keyboard to select an image and press Enter.
For example, you might see:
Windows11.iso
Ubuntu.iso
LinuxMint.iso
Select the desired image and follow the boot options displayed by Ventoy.
This means a single USB device can function as a portable collection of operating-system installers and recovery tools rather than being limited to one bootable image.
Why Ventoy Is Useful
The biggest advantage of Ventoy is the way it separates the boot environment from the actual image files.
With many traditional USB creation methods, replacing the operating system image requires writing the new image to the entire drive again.
With Ventoy, you install Ventoy once and then manage the images as ordinary files. The official project describes support for multiple image types and the ability to copy many files to different folders and boot them from a menu. (Ventoy)
That makes Ventoy particularly useful for technicians, IT students, system administrators and anyone who frequently installs or repairs computers.
Common Mistakes to Avoid
Selecting the wrong disk: The initial installation erases the selected USB drive, so verify the device before clicking Install.
Extracting ISO files unnecessarily: Ventoy is designed to boot supported image files directly.
Using outdated Secure Boot instructions: Current Ventoy releases have changed parts of the Secure Boot process, including the key enrollment procedure. (Ventoy)
Assuming every ISO will work: Ventoy supports a large range of operating systems, but compatibility is not identical for every image and every computer.
Treating the Windows 11 bypass as official support: A bypass can circumvent installation checks, but it does not make unsupported hardware officially supported.
Final Takeaway
Ventoy turns a USB drive into a flexible multiboot toolkit. Install Ventoy once, copy multiple ISO files to the drive, and select the system you need from the boot menu.
The process is straightforward: download Ventoy from the official site, install it on the USB drive, copy your ISO files, boot the computer from USB and select an image.
For people who regularly install Windows, test Linux distributions or troubleshoot computers, that simple workflow can save a considerable amount of time.
The most important precautions are equally simple: back up the USB drive before installing Ventoy, verify the correct device, use official ISO files, and treat Secure Boot and Windows 11 hardware bypasses as advanced configuration rather than something to enable blindly.


